 I wanted to show another set of photos of how I go about painting. In the last series I showed, I don't think the photos were that great - hopefully these will be better:
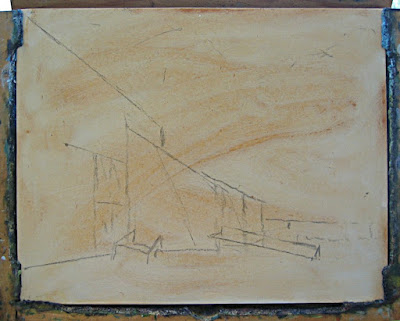
Step 1: The sketch. The building lines were extremely important to this painting, so that's what I concentrated on - getting the perspective of the building right. Other than that, just a few light lines to indicate the top of the tree line. That's all I needed at this point. As usual, I'm working on a panel toned with a light wash of yellow ocher.
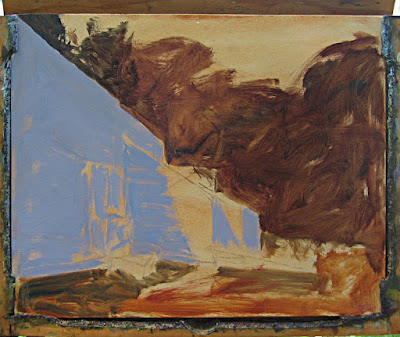
Step 2: Blocking in. I painted the shadows bluer than they were intentionally so I could drag a more neutral grey over it later, but plan on letting some of this bright blue peek through. The rich brown of the background trees makes a good base for the greens that come later. Again, planning to let some of the browns show through. You really have to think ahead at this stage. Looks like a real mess, doesn't it?! Remember what I said about every painting going through an ugly stage.
Step 3: More roughing in. I put some sky color down and softened to the tree line. The grass is blocked in mainly with the shadow color, even though the sunlit greens will be much warmer - again, I'll let some of this blue-green peek through. With some detail in the building and carts, it's starting to look like something.
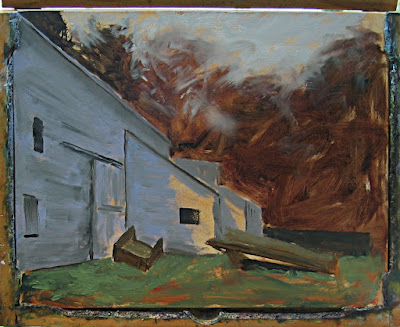
Step 4: Work on the background trees. I try to get some variety in the greens so that it's not monotonous. Green is one of the most difficult colors to deal with - there can be so much of it in a typical landscape, and there are so many different shades of green - it's hard to pull off sometimes. The sunlit grass color is also added, but note that the building shadow line on the grass is out of perspective. It's easy to forget that even shadows have to follow the rules of perspective. I correct this later.
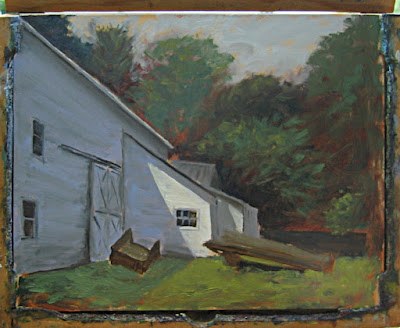
Step 5: Tree trunks are are put in, and the carts are refined a bit.
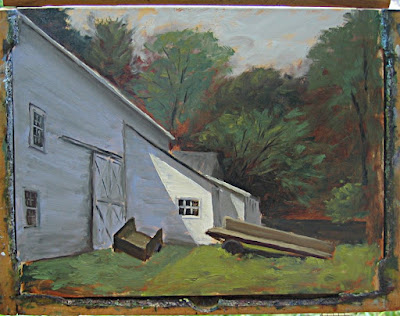
Step 6: "Sky holes". I previous steps, the tress were blocked in as solid masses. But if you look at the photo of this scene, there is a lot of sky peeking through the trees. So I start painting some sky color over the trees now - this technique is called painting "sky holes" and you can usually get more realistic trees by carving them up with sky holes, than you can my trying to paint trees into the sky color. It's almost like you're sculpting the trees out of the solid greens and browns. The perspective in the grass shadow is corrected here:
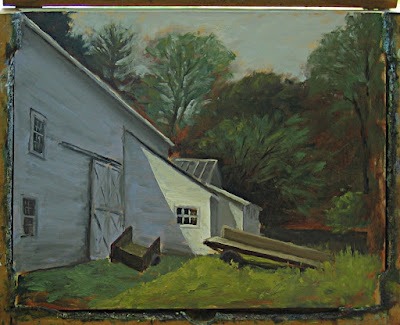
The finished painting:
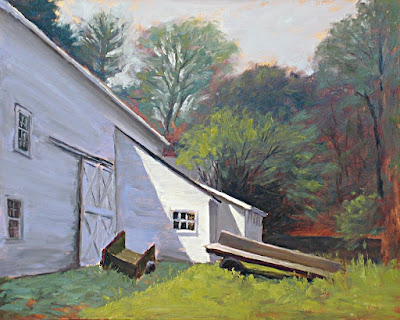
"Stony Brook Farm Carts"
8x10 oil on panel

8x10 oil on panel

I have a few more closeup shots of the finished painting on my main website, here.
I looked at the photo's and thought to my self... "well, he'll never make anything of this painting" ... after looking at the second photo. Then slowly I scroll down the page and WOW... you accomplished yet another winner. Thanks for the demo. It helps those of us who are intimidated by oils.
ReplyDeleteThanks, Nancy. Like I said, it seems that every painting goes through an 'ugly stage'. And of course a few never make it past that stage, but I won't be showing those off! :-)
ReplyDeleteThank you for creating this demo. It is very helpful and encouraging.
ReplyDelete